PUBLISHED: Feb 17, 2015
DESCRIPTION:
Part 1: http://youtu.be/nCqJuzD7qhk
Part 2: http://youtu.be/tWfPUbjIXA4
Part 3: http://youtu.be/kkSp3VEws94
Part 4: http://youtu.be/DH8rT-oD81Y
THANK YOU SO MUCH FOR THE SUPPORT!! I'm really glad people are taking to these tutorials, and i just want to thank everyone for subscribing. I want to develop this series and get eventually live stream my production sessions so people can tune in while I make stuff. lots of stuff planned so stay tuned!! :D
but anyway..
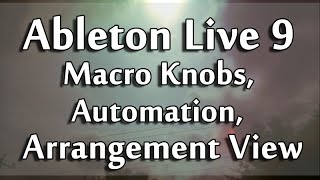
WOW part 5 already! This one is going to be talking about macro knobs, using the arrangement view and how to automate your stuff to get some really cool effects!
We'll start off by grouping your tracks. 'Ctrl+G' will group your selected devices which will allow you to save them as custom instrument racks. Doing so will help with organizing your workflow and keep your instruments for future projects.
Macro Knobs: 0:25
By clicking the knob option on the left of the instrument rack you can open up your Macro Control Knobs. You can also right click a parameter and click "map to macro x" and to map that parameter to a macro knob.
You can color the knobs and even rename them, but the best part is that you can modify the minimum and max ranges of the knob, to better control your macro'd parameters with the 'Map' button. you can map more than one parameter to a macro knob. In the video I map the Frequency Filter in the Operator and the Filter Frequency of the Auto-Filter.
Arrangement View: 3:33
Up until now we were working in the Session view which allows you to work with your ideas as individual clips which are sort of like building blocks. With the Arrangement view you have a bigger overview as you can now see your building blocks in a time line. To carry them over, select your the clips you want to use, click and hold them and either push Tab or drag them to the top right over the Arrangement View/Session View toggles (3 horizontal lines and 3 vertical lines). This gives you more control in terms of arranging your song from start to finish but also automations.
Automation: 4:33
You can draw in more precise and elaborate automations over a longer period of time, as opposed to drawing in the modulation in the Session View, which is based on the length of the clip. All you have to do is right click the knob you would like to automate and select, "Show Automation in New Lane". Now you can draw in your automation! When you have multiple parameters being automated, adding it to new lanes really helps to see the automations you have selected working in relation to one another.
Sorry for the delay on the video, it takes a bit of time to shoot and edit them, thank you for your patience and understanding!!
Ultimately it is based on your preference and work flow and your overall production style. These tutorials are meant to show the different options that you have available to work with!
Vocals belong to jabe biquet :
https://soundcloud.com/teacup-feels/fluxxy-lullaby-stem
My Links :
https://soundcloud.com/sirens-and-satyrs
https://twitter.com/sirensandsatyrs
http://instagram.com/sirensand