PUBLISHED: May 12, 2016
DESCRIPTION:
Get Unlimited Premium Mix Training: https://theproaudiofiles.com/members
Train your ears to EQ like a pro: https://quiztones.com
A video on some basic pitch shifting demonstrated on a lead vocal.
—
Transcript:
Hey guys! Eric Tarr here for theproaudiofiles.com.
In this video, I'm going to show you four basic methods of creating pitch shifting effects inside of a digital audio workstation.
A basic idea or concept of a pitch shifting effect is to give you as the audio engineer the ability and control the frequency of a recorded signal. Increase the frequency or decrease the frequency. It's up to you then to decide how you want to use this as a creative effect.
There are several different methods to do this. I'm going to show you a very primitive method first that kind of replicates how pitch shifting effects were replicated on an analog tape machine.
Recording on an analog tape machine, an engineer would have to choose how fast the tape was going to go through the machine. What you could do after you recorded is play back the tape at the wrong tape speed. If you played it back at a faster tape speed or a slower tape speed, it would change the pitch.
The first thing I'm going to show you is how you can do a similar sort of thing in a digital audio workstation. This is going to recreate some of those famous vocal sounds like Alvin and the Chipmunks, where you'd pitch shift it up, play it back at a faster speed, and then change the tone and timbre of someone's voice.
Or you could play it back at a slower speed, and it would kind of give you a much lower voice. There are also some much more musical examples using this kind of effect on a tape machine, where The Beatles recorded the piano solo on In My Life at the wrong tape speed intentionally so they could play it back to fit with the key of their song.
Just several examples of doing this sort of effect.
How you can replicate this in a digital audio workstation is just change the speed or the length of this signal that you've recorded. I'm going to be working with this vocal recording here that goes along with this acoustic pop song. Let me play the song and then get to the different methods.
[mix playback]
First thing I'm going to do is show you how to use time compression and time expansion to change the length of this file. Essentially playing it back at the wrong speed.
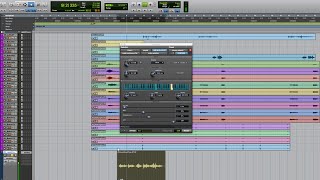
I'm going to accomplish this by using something called Elastic Audio. It's an ability for your digital audio workstation — Pro Tools — to change the length of a file — to compress it in time, or expand it over time.
I'm going to do this here by turning on a specific one called Varispeed. This is going to replicate the idea of a tape machine. Playing it back at a different speed.
Now that I've got it turned on and analyzed, what I'm going to do — I've got this clip highlighted — come up here to the top, find clip, and find the elastic properties menu. Here, I have the ability to go in and do time compression and time expansion. So I can make it twice as long by typing in 200%.
You can see that now, the signal has been stretched out. Let's listen to how it sounds.
[vocals stretched]
So the result is I pitch shifted it down by 12 semitones, or one octave.
In order to undo this, go the opposite direction. Here, I'll go up a time compression and expansion factor of 50%. Now it's going to be half as long. Let's listen to the pitch now.
[vocals shrunk]
So I've gone up — pitch shifting up 12 semitones, or one octave.
Now, this sort of effect, it accomplishes the pitch shifting. The issue that comes up though is I've also changed how that signal lines up with the rest of my song.
So if I were to go in and have it be half the length, let's listen to the vocal in the context of the song.
[mix with fast, high vocals]
So what I've done is thrown off how the signal synchronizes with the rest of my track, and that's a problem. This is a very primitive method of doing pitch shifting, so it might not work in all situations, especially if you're trying to make sure your signal lines up with your song.
So I'm going to show you a second method then that's going to preserve the timing information of the signal. This is going to be a similar thing, except I'll use an Audio Suite processor.
Up here, I've got the clip highlighted. I'm going to go into pitch shift and turn on Pitch II. This is an Audio Suite processor that analyzes and processes the entire signal at one time.
So if I wanted to go down by an octave, I could go from middle C down to an octave below. Change it by 12 semitones and render that whole file. You'll see that the timing is actually preserved.
[mix with deep vocals]
Or I could go in the opposite direction. I could go up an octave.
[mix with high vocals]
If I like, there's a parameter on here called the mix knob, or mix slider that will allow me to blend in some of the original unprocessed, or the correct pitch, to go along with the octave.
[truncated]


![Mixing Rock: EQ'ing and Fading Distorted Guitar Tails [Excerpt]](https://img.youtube.com/vi/oWtEz-dGOj8/mqdefault.jpg)

![The Signal - Fade Away [Music Video-Tribute 2014]](https://img.youtube.com/vi/YgUvNIh94Zw/mqdefault.jpg)
![Propa Fade - Cougar [Raw] (June 2014) Top Class Riddim - UIM Records | Dancehall](https://img.youtube.com/vi/h02P4Uiqajg/mqdefault.jpg)


![Showtek - Slow Down (Anthem Emporium 2013) [Music Video]](https://img.youtube.com/vi/X5Adj6XJFTQ/mqdefault.jpg)


![MegaBeat Audio - Darth Fader (fade in/out pedal) [ENG]](https://img.youtube.com/vi/fAvzVTN137s/mqdefault.jpg)