PUBLISHED: Sep 29, 2014
DESCRIPTION:
Get Unlimited Premium Mix Training: https://theproaudiofiles.com/members
Train your ears to EQ like a pro: https://quiztones.com
Jonathan Roye walks you through how he approaches processing on the drum buss using EQ, compression and saturation.
—
Transcript:
What's up guys, welcome to another video here. My name is Johnathon from mixnotes.tv.
I have a Youtube channel, you can go check that out if you want. Regardless, I'm here to show you a little trick with the drum buss to sort of break down what I do. I get a lot of questions about drum compression, and if I need huge drums, do I need to use tons of compression and slam the drum buss and stuff.
I've got a track here that's very dramatic, I'll play it here for you in a second. I'm going to break down a couple plug-ins that I use on my drum buss, and hopefully you guys pick up some tips and tricks.
Let's get into it, the track sounds like this.
[music]
So really big, super dramatic, real spacey. Here is on the chorus, the solo drums.
[drums]
So, got my drum buss here. We've got an EQ, I've got one compressor, and I have a tape emulation plug-in. So, that's obviously the finished product. If I bypass everything, you get this.
[drums without processing]
Still really big. I will say as far as compression goes on kicks and snares and stuff, I don't really use tons. I mean, obviously with a track like this, I've got multiple kick drums, multiple snares, claps, percussion stuff.
I run a lot of stuff in parallel, and I use a lot of 1176s because I like them. So things that will get smashed extremely hard are these parallel compression busses for snares and kicks, and then they sort of get blended up. But other than that, nothing is really going beyond 3-4 dB of compression, but I just wanted to make a little side note there.
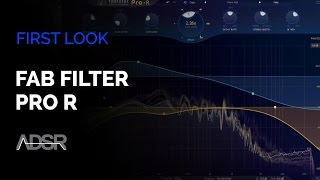
Back to the drum buss. First thing we do, Pro-Q 2 EQ from FabFilter, everyone is ranting and raving about this thing because it's awesome, and this is what I do to the drums. I do a little high passing. 37, just to clean up some of the super subby subby stuff. It's not a hip-hop track, so I don't need anything down there.
Not a ton of stuff down there, but at the same time, there's a lot of kind of pillowy sort of sub stuff if that makes sense. I usually find success with notching out a little 300-400 somewhere. In here, I've got 338. Then I'll also shelf on the top end around 10k. Keep in mind, all these moves are really subtle. These are a dB and a half, 2 and a half dB here... So let's do an A/B here on the EQ moves.
[drums, before and after processing with Pro-Q 2]
In that 338 dip does a lot of what you're hearing. Let me bypass this band. I'll turn this on and off.
[drums play, before and after 338Hz dip]
Then the top end, you just get a little bit of that air for the cymbals and whatnot. The real kind of ticky clicky stuff from the sticks and snares.
[drums play, before and after high shelving EQ]
Again, subtle moves. So that's our EQ, nothing crazy.
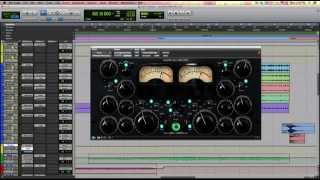
Then I go to Shadow Hills Compressor. I dig this thing, but I only really dig the discrete side of it, and I also use it in dual mono. I don't know, that may just be me being crazy. I'm not a real technical guy, I just kind of mix by feel and emotion and all that, but I feel like in dual mono, it gives each side of the stereo field – especially with drums like this – they're not always completely symmetrical all the time, so it sort of gives the compressor freedom to compress and move as it needs to between the left and right speaker.
With that said, you can check out the settings here, and I'll play it and I'm just going for a little point, and again making the drums a little tighter, a little more aggressive. Not a ton of compression.
[drums with compressor]
So that's with. I'll bypass it. This should be level matched fairly close.
[drums with no compressor]
Things just get a little more punchy. I think my ratio is around 3:1. The recovery time is pretty quick, attack time is pretty slow, so it's got time to let those transients through and give you the punch and the front end you want.
So, that's compression land.
Then I used this Studer from UAD. This is one of my personal favorite tape plugs. And again, I've got it set up where it's fairly darkish. Again, TP9 tape, 7.5 calibration, 7.5 IPS, not really running it too hard. Check it out, it sounds like this.
[drums]
If you guys want to check out the biasing controls, that's how I have them set up.
[drums]
There's not a lot to a lot of this stuff. A lot just comes from using the right samples and just gain staging and balancing the tracks to sound huge when they need to, as compared to other tracks and sounds, so.
Anyways, I hope this was helpful to you. Again, you can check out my YouTube channel, there will be a link below. Mixnotes.tv, I've got a bunch of stuff over there.
I'll play this with the track one more time and get out of here.


![JoJo - FAB. (feat. Remy Ma) [Official Music Video]](https://img.youtube.com/vi/4_4b9ZcewYI/mqdefault.jpg)


![[DANCE VIDEO] Eugy Official x Mr. Eazi - Dance For Me | prod. by Team Salut](https://img.youtube.com/vi/Ionm6jriHEI/mqdefault.jpg)


![The-Dream - Rockin' That Thang (Remix) [Official Video]](https://img.youtube.com/vi/3H25KfLq-VU/mqdefault.jpg)