PUBLISHED: Jan 21, 2012
DESCRIPTION:
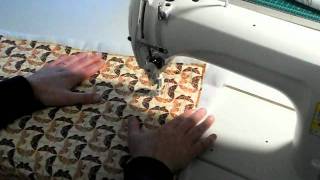
Free-Motion Quilting (Stippling) on my new Juki DDL 8700 Industrial Sewing Machine.
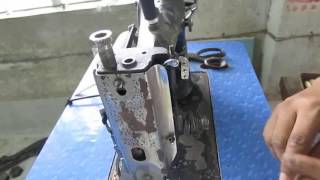
DARNING FOOT:
If you're using this machine for quilting you will need to purchase an additional Darning foot and screw. The screw size I got at the hardware store was an M3 - .50x20 (metric)
The darning foot is a generic foot to fit this machine (you can google it.) I have a closeup photo of the foot on my machine, if you would like it feel free to email me at KatiesQuiltsandCrafts@gmail.com
to HOP or to NOT HOP?
I know that other quilt artists recommend altering this foot - I highly recommend you do NOT alter the darning foot in any way. If you are going to be quilting LARGE quilts often, I believe that you NEED the "hop" in the "hopper foot" to be successful. The "hopping" of the darning foot acts as an "even-feed" foot, which keeps your quilt sandwich stable and prevents puckers and pleats.
BASTING:
If you are not basting your quilts properly, you are not going to be successful with your FMQing. If you are going to be quilting LARGE, bed-sized quilts, I highly recommend the Sharon Schambers method of basting. She uses 2x4s and needle and thread. The wooden boards are a MUST (although they can be 1x3s 2x5s too,) but I am too impatient for needle and thread and I just use medium-sized quliting safety pins.
I have a tutorial on my version of Sharon Schamber's basting method here: http://katiesquiltsandcrafts.blogspot.com/2012/03/basting-photo-tutorial.html
MORE INFO:
If you are using this machine (or any machine) to learn FMQ, please be patient. I firmly believe that you must "TEACH" your machines to quilt in free-motion.
These types of machines are meant to go in ONE direction, with the help of feed dogs. We are trying to persuade it go in all different directions, all while keeping PERFECT tension. On your first few tries, you will definitely experience uneven stitches and tension and most likely thread breakage.
PRACTICE:
I recommend quilting at least 5 large quilts with a pattern you are comfortable with (stippling/meandering) before moving on to more advanced techniques (feathers/paisleys.)
If you quilt as often as I do, 5 quilts will be nothing to you, and soon you will be free-motion quilting with this machine (or any machine) with ease.
If you notice that when you go in one specific direction and are getting some weird stitches, and adjusting the tension doesn't help - I recommend covering your feed dogs with card stock. Just tape the card stock over the feed dogs, but poke a hole large enough for your needle to fit through. This is also helpful for beginner FMQ-ers.
FEED DOGS:
Many FMQ tutorials tell you to drop the feed dogs.. . . I have not had any success with this method as of yet. The only machines I have worked with are Brother, Singer, Juki, and Janome. None of these machines give good results with dropped feed dogs, although they all give the option. Personally, I like the feed dogs to be up, because it allows me to "feel" each stitch and it helps me keep a more regulated stitch length as I am quilting. If you are just starting out - I think dropping your stitch length to ZERO and covering your feed dogs is a really good way to go. But if you have some experience, I would just leave the stitch length at its automatic setting. This is the setting you are used to "hearing" and "feeling" as you sew. If you are comfortable and familiar with your sewing machine, you have grown accustomed to how hard to press the foot pedal and how fast the machine will go accordingly. Likewise, when FMQing, you will get that same "feeling" even though the feed dogs will not be guiding you as usual.
It's as if you were driving a car, and you are going from standard to automatic. Let's say that if you were driving a standard, and you have to pay close attention to the RPM so as to know when to change gears. Then you suddenly switch to automatic. Although you don't really need the RPM gauge anymore, you already "know" and "feel" when it's time to shift gears.
That's the best analogy I can come up with for this type of thing. Hopefully all of you have had the pleasure of driving a stick shift ;c)