PUBLISHED: Jan 06, 2012
DESCRIPTION:
More info - http://bit.ly/AsK8eS
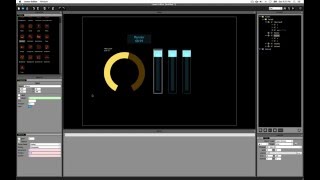
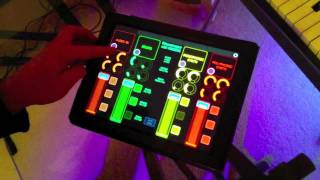
The original Lemur was a hardware unit, introduced back in 2004. Used by the likes of Björk, Richard Devine, and Modeselektor to name a few, it was one of the first multitouch touch screen controllers. After years of woe and longing, the legendary Lemur software is available for use on iOS devices. The main advantage of using a touch screen controller is the fact that you can create your own unique interfaces, full of buttons, knobs, pads, faders, or whatever else you'd like. The Lemur Editor (formerly called the JazzEditor), is software that runs on your computer, and is where custom interfaces are created for use with Lemur.
In part one of this two-part series, basic setup of the Lemur and Lemur Editor are explained. To start, an Ad-Hoc network is created. Once the iPad running Lemur software is connected, it will automatically update with the changes made in the editor. As far as objects go, we'll start with the Fader and MultiBall. A great thing about the Lemur is its physics engine, which we can use with both objects. After MIDI is set up, it's time to take a look at the Lemur Daemon. The Lemur Daemon brokers internal MIDI connections between incoming Lemur control signals and other programs running on your computer, such as Ableton Live. Here, we set up the connection manually.